What is a Full Node?
A "full node" is a client that owns the blockchain and is sharing blocks and transactions across the network. A "node" refers to any computer that's running NewYorkCoin client software and is able to send and receive transactions. It could also be mining, but it doesn't have to. Lightweight clients such as Electrum Wallets or Mobile Wallets are NOT considered full nodes since they do not download the blockchain or share the blockchain with the network.
Minimum Requirements
- Desktop, laptop, or other hardware running recent versions of Windows, Mac OS X, or Linux
- 8+GB of free disk space (current size of the blockchain plus room to grow)
- Minimum 2GB of RAM
- Internet connection (wired or wireless)
- Port Forwarding on your router must be configured. Port 17020 will need to be forwarded to your devices IP address on your LAN to allow incoming connections. Checkout PortForward.com if you need help with this.
NOTE: Make sure to disable any low power mode, sleep, and suspend settings to ensure your device is online at all time.
Windows Install
If you have an older version of NewYorkCoin wallet installed, then backup your wallet.dat first before going any further.
- Let's start by downloading the latest release zip file from NewYorkCoin-NYC Github.
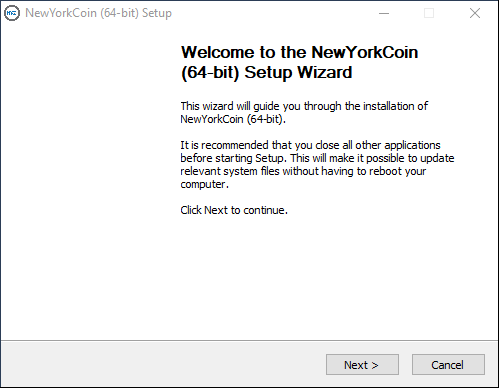
- Run newyorkcoin-1.3.1-win64-setup installer if your computer/OS is 64-bit or run the newyorkcoin-1.3.1-win32-setup installer if your computer/OS is a 32-bit. If you're not sure on how to check this then search Google.
- Click Next to continue
- Keep the default destination folder C:\Program Files\NewYorkCoin or change to a different directory if you prefer, then click Next to continue.
- Now click Install to kick off the installation.
- Click Next and then Finish to run NewYorkCoin.
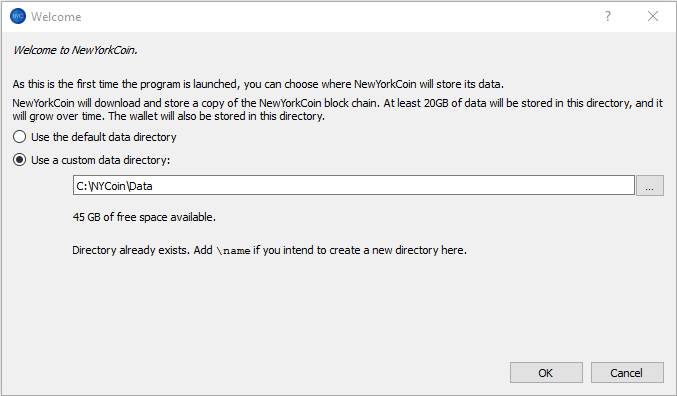
- If this is your first time installing, then it will ask you to choose a data directory where the blockchain data and wallet.dat will be stored. Leave the default data directory option selected or browse to a custom data directory on your computer then click OK. If you have a previous version then you won't have to worry about this part, your blockchain data and wallet.dat will be in the same original location.
- Click on the Windows key and start typing NewYorkCoin and you should see NewYorkCoin 64-bit or 32-bit if you installed the 32-bit version. Click on the icon to start your wallet.
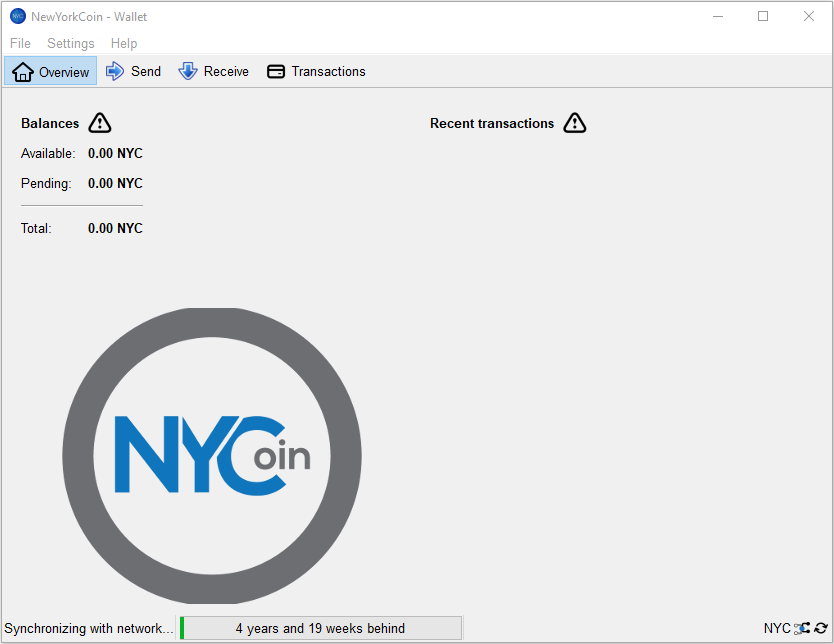
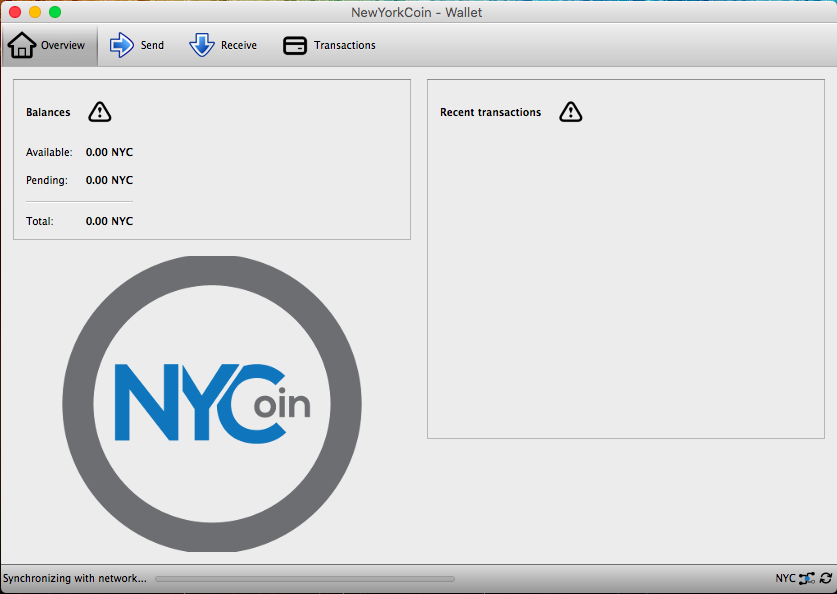
- On the bottom you'll notice it say Syncronizing with network... This means we are now connected to the network and the blockchain is being downloaded to the directory you specified during install. This will take some time (depending on your computer and connection speeds) to fully sync.
- Create a new Text Document in C:\NYCoin\Data and name it newyorkcoin.conf
- Copy and paste all of the content below to the newyorkcoin.conf file you just created. Change the rpcpassword to a random generated password (you do not need to remember this password). The username and password MUST NOT be the same, then save the file.
- On your desktop, create a new Text Document and name it startnyc.bat
- Now edit startnyc.bat with Notepad then copy and paste all of below to the batch file and save it.
- Doubleclick the batch file startnyc.bat you just created on your desktop and you'll notice the command prompt window open and minimize to your taskbar.
- Now let's test everything. Open a new command prompt window and type:
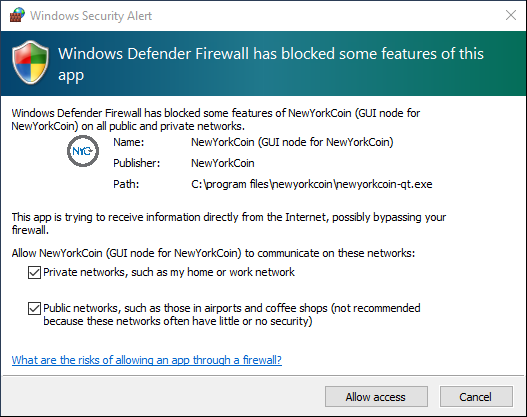
You may get a Windows Security Alert. Check both boxes to add an exception in your firewall to allow NewYorkCoin to make outbound connections.
NewYorkCoin - Wallet is now installed.
If you want to run NewYorkCoin Wallet in Graphical User Interface (GUI) then continue onto the next step. If you prefer to run NewYorkCoin Daemon (recommended for advanced users only), then skip to the NewYorkCoin Headless Daemon install section below.
NOTE: You cannot run both the GUI and the Daemon in the same data configuration directory at the same time.
NewYorkCoin Wallet (GUI)
Port Forwarding on your router must be configured. Port 17020 will need to be forwarded to your computers IP address on your LAN to allow incoming connections. Checkout PortForward.com if you need help with this.
Once the blockchain is downloaded your location will show up on the Map and thank you for helping to strengthen the NewYorkCoin network.
NYCoin Headless Daemon Nodes
Let's start by creating a config file and set the daemon to run as a full node.
# You must set rpcuser and rpcpassword to secure the JSON-RPC api
rpcuser=newyorkcoinrpc
rpcpassword=Change_Me

# Listen for RPC connections on this TCP port
rpcport=18823

# RPC connection from localhost allowed
rpcallowip=127.0.0.1

# Run newyorkcd as a daemon
daemon=1

# Run newyorkcd as a full node
server=1

# listen=1 to accept connections from outside
listen=1

# Run the full node on port 17020
port=17020

# Limit the max number of connections to this node
maxconnections=125
Now let's create a batch file to start the Daemon
@echo off
pushd C:\NYCoin\newyorkcoin-1.3.1\bin
start /min newyorkcoind -datadir=C:\NYCoin\Data
You might also get a Windows Security Alert. Check both boxes to add an exception in your firewall to allow NewYorkCoin to make outbound connections
Then type:cd C:\NYCoin\newyorkcoin-1.3.1\bin
newyorkcoin-cli -datadir=C:\NYCoin\Data getinfo
Click the UP arrow key then press Enter and you'll notice the "blocks" size count increase. The blockchain is being downloaded to C:\NYCoin\Data and this will take some time (depending on your computer and connection speeds) to fully sync.
If you get an error: {"code":-28,"message":"Loading block index..."} which is actually good. It will take some time to re-index. Check again in a few minutes by clicking the UP arrow key then Enter. Eventually you should see something like below:

NOTE: You will need to keep the file running on your taskbar to keep the daemon running. To close the daemon, close the minimized command prompt window on your taskbar. You can also configure the batch file to run on startup or run as a service so the daemon automatically starts after a reboot.
Port Forwarding on your router must be configured. Port 17020 will need to be forwarded to your devices IP address on your LAN to allow incoming connections. Checkout PortForward.com if you need help with this.
Congratulations if you made it this far, once the blockchain is downloaded your location will show up on the Map and thank you for helping to strengthen the NewYorkCoin network.
MacOS Install

If you have an older version of NewYorkCoin wallet installed, then backup your wallet.dat first before going any further.
- Let's start by downloading the latest release dmg file from NewYorkCoin-NYC Github.
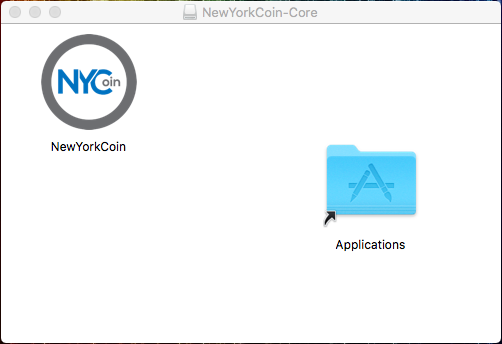
- Doubleclick the dmg file to start the install
- Drag and drop NewYorkCoin into Applications.
- Now click
 (Launchpad) from the doc and start typing NewYorkCoin.
 - Click NewYorkCoin to start the wallet.
- Click
 (Finder) from the Doc then click Applications and scroll down until you see NewYorkCoin and doubleclick to open.
 - Controlclick the NewYorkCoin icon, then choose Open from the shortcut menu.
- Click Open again.
- If this is your first time installing, then it will ask you to choose a data directory where the blockchain data and wallet.dat will be stored. Leave the default data directory option selected or browse to a custom data directory on your computer then click OK. If you have a previous version then you won't have to worry about this part, your blockchain data and wallet.dat will be in the same original location.
You should now see this:
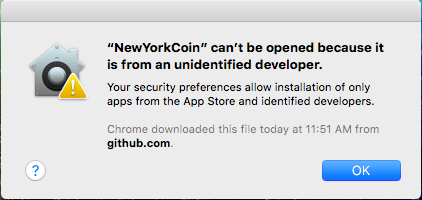
You may get a pop-up "NewYorkCoin" can't be opened because it is from an unidentified developer. click OK here.
Now we will need to override the security settings so we can open the app anyway.
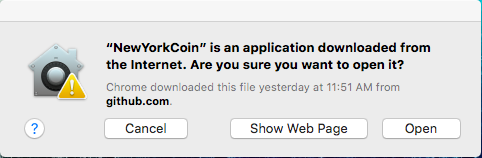
The app is now saved as an exception in your security settings, and you can open it in the future by doubleclicking it just as you would any app.
The wallet will need to synchronize with the network and download the blockchain. This will take several hours.
Port Forwarding on your router must be configured. Port 17020 will need to be forwarded to your computers IP address on your LAN to allow incoming connections. Checkout PortForward.com if you need help with this.
Once the blockchain is downloaded your location will show up on the Map and thank you for helping to strengthen the NewYorkCoin network.
Raspberry Pi Install
Raspberry Pi is a low cost and low power device that can run silently 24 hours a day without worrying about uptime. It requires less maintenance and you have the advantage of plugging it in anywhere in your house and you wont even need a monitor, keyboard, or mouse plugged in once it's configured.
Currently we are shipping pre-built ready to plug in Raspberry Pi's with the blockchain already downloaded and ready to act as a full node. If you're interested, you can purchase your own from our Shop.
Parts Needed
- Raspberry Pi 3 Model B or B+
- Mirco USB Power Supply
- MicroSD card with 16+ GB of storage (class 10)
- Raspberry Pi Case
- HDMI cable
NOTE: There are bundled kits available to purchase with all the parts listed above if you prefer to take that route. You will also need a keyboard, mouse, and a monitor for the initial setup. Also, a computer with a MicroSD card reader.
Software Needed
- Win32DiskImager for Windows or Etcher for MacOS
- SDformatter available for Windows or MacOS
- 7-Zip for Windows or The Unarchiver for MacOS
- PUTTY for Windows, for MacOS you can use Terminal
- VNC Viewer available for Windows or MacOS
- RASPBIAN STRETCH WITH DESKTOP zip downloaded on your computer
NOTE: For this guide I will be using Windows. If you have a Mac then please use the appropriate software listed above and try and follow along. Make sure all the software listed are installed on your computer and your Raspberry Pi is plugged in before you get to first step.
Let's Get Started
- On your computer, unzip the Raspbian Stretch zip file you downloaded and remember this location where you unzip the image file to.
- Insert your MicroSd card into the adapter and insert into your card reader.
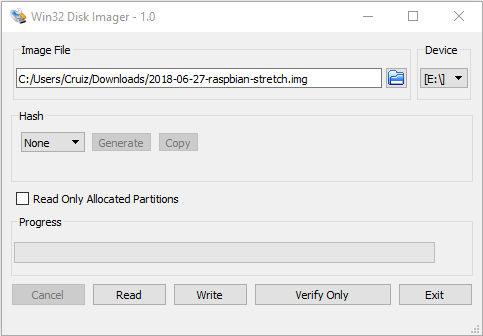
- Now open Win32DiskImager (or Etcher for MacOS) and select the 2018-XX-XX-raspbian-stretch.img file. This will load the Raspbian image onto your MicroSD card.
- Once everything is selected correctly like below, click on Write then click Yes to confirm and continue.
- Make sure the correct drive letter is selected for your MicroSD card under Device.
- Safely eject your MicroSD card from your computer and insert it into the MicroSD card slot on the Pi.
- Plug in your Raspberry Pi to the mirco USB power supply, keyboard, mouse, and your monitor. If you plan on using a network cable instead of WiFi then plug your ethernet cable in also.
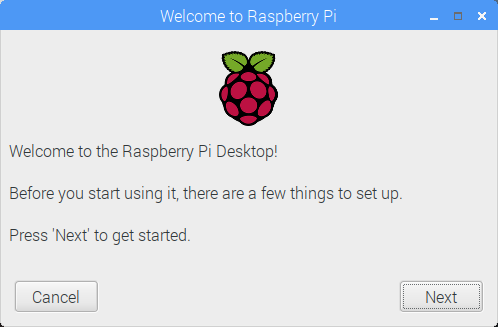
- Click Next to get started.
- Now select your Country, Language, and Time zone and click Next.
- Set your password, make sure it is something secure and click Next.
- Select your WiFi Network and click Next to enter in your WiFi Password.
- Finally, click Next to allow it to check and install latest Raspbian updates. If you get an error, go back and try again.
- After the updates are installed, click OK then Reboot.
- Once it boots up, you should see a message your Raspbian has been updated. Click OK.
- Now click
 on upper left to open Terminal and type:
 - Click
 on upper left to open the Application Menu, then click Preferences > Raspberry Pi Configuration.
 - Under the System tab, change the Hostname if you'd like. Do not click OK just yet.
- Click the Interfaces tab, enable SSH and VNC, then click OK and Yes to reboot.
- Now using your IP address you can connect to your Raspberry Pi via SSH using Putty or remote to desktop using VNC Viewer from your computer. You can also continue with your keyboard/mouse/monitor. The username you'll need to connect with is pi and use the password you set during the setup wizard.
- Now we need to Increase the Swap File from default 100 to 1024
- Apply the changes by typing:
- Install all required dependencies
- Let's create a bin directory and download our files there.
- Download NewYorkCoin
- Begin our install
- Start the daemon
- Now let's create a directory to store our config file and blockchain data in, or use the default location /home/pi/.newyorkc
- Let's create the config file and set the daemon to run as a full node.
- Copy and paste all of the content below to the newyorkcoin.conf file you just created. Change the rpcpassword to a random generated password (you do not need to remember this password). The username and password MUST NOT be the same, then save the file.
- Copy and paste all of below to the start_nyc.sh file you created
- Now lets make this script executable
- Now lets configure a cron job to to autostart on a reboot.
- Add this line to bottom of file:
- We're almost at the finish line, let's reboot the Pi
- Open Terminal or SSH and type:
- You'll need to stop NewYorkCoin on both your PC and your Pi before copying the files. To stop NewYorkCoin on the Pi run:
- After you connect to your Pi with WinSCP, copy only the chainstate and blocks directories to the /home/pi/.newyorkc directory on your Raspberry Pi.
- After the files have been copied, start the newyorkcoin daemon on your Pi by running
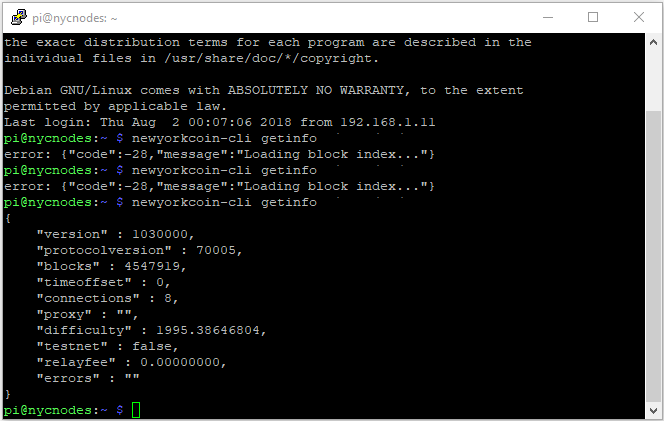
- After it says NewYorkCoin has started, you can check the status
- It will give you an error: {"code":-28,"message":"Loading block index..."} which is actually good. On a Pi it will take a while to load the block index. Give it about an hour and check again by clicking on the UP arrow then press Enter. Eventually you should see something like below:
Once it's finished, Raspbian will be imaged onto your MicroSD card. If you run into any issues with this, then try formatting your SD card using SDformatter first.
Now onto the Fun Part
Your Pi should now be booted into desktop environment called PIXEL. Raspbian with PIXEL (which stands for 'Pi Improved Xwindow Environment, Lightweight').
When a new Raspbian image is booted for the first time, a simple setup wizard runs automatically to walk you through the basic setup operations.
Once you get to the end of the wizard, it will not re-appear when your Pi is booted. If you do want to use it again in the future for any reason, you can relaunch it from Terminal by typing:
sudo piwiz
ifconfig
Look for wlan0 for WiFi or eth0 for ethernet to get your IP address (inet).
NOTE: I highly recommend you reserve the IP address on your router which in the long run will make things a lot easier. You can reserve by using the MAC address. Search Google if you need help with this.
The setup wizard already updated everything so there is no need to run it now but this is a useful command to know if you want to update everything again in the future.
sudo apt update && sudo apt upgrade -y
A swap file allows the Micro SD card in the Raspberry Pi to be used as RAM. This step is important since we'll be downloading the entire blockchain on the Pi.
Let’s start by editing the file /etc/dphys-swapfile by running:sudo nano /etc/dphys-swapfile
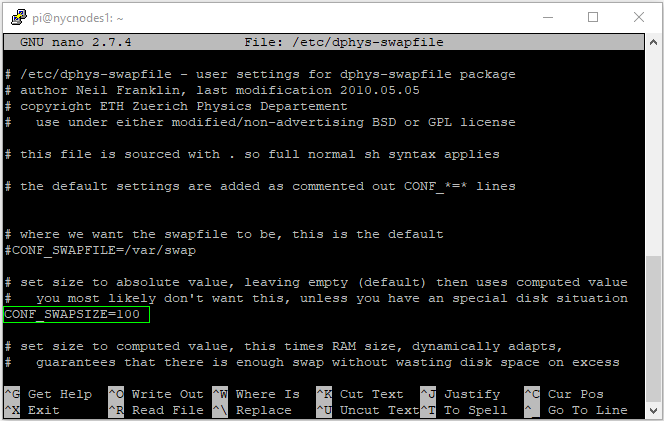
Change the line CONF_SWAPSIZE=100 to CONF_SWAPSIZE=1024 and hit Ctrl + X followed by Y then Enter to save the file.
sudo dphys-swapfile setup && sudo dphys-swapfile swapon
sudo apt-get install autoconf libevent-dev libtool libssl1.0-dev libboost-all-dev libminiupnpc-dev -y
mkdir ~/bin
cd ~/bin
git clone https://github.com/NewYorkCoin-NYC/nycoin.git
cd nycoin
./autogen.sh
./configure --enable-upnp-default --disable-wallet
make -j2
sudo make install
NOTE: It's recommended to use make -j2 since it's quicker than just make. The -j2 tells the Pi how many of its processor cores to build with. The higher the number the faster it builds. In theory up to -j4 is possible but not recommended. This will take over an hour to compile, so take a break. If you encounter errors just run make instead.
newyorkcoind
You'll get an error message below since the config file does not exist
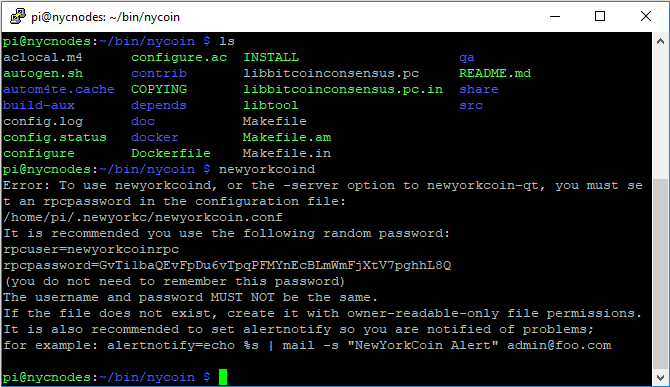
NOTE: Linux is case sensitive so make sure you type everything per instructions
cd ~
cd .newyorkc
nano newyorkcoin.conf
# You must set rpcuser and rpcpassword to secure the JSON-RPC api
rpcuser=newyorkcoinrpc
rpcpassword=Change_Me

# Listen for RPC connections on this TCP port
rpcport=18823

# RPC connection from localhost allowed
rpcallowip=127.0.0.1

# Run newyorkcd as a daemon
daemon=1

# Run newyorkcd as a full node
server=1

# listen=1 to accept connections from outside
listen=1

# Run the full node on port 17020
port=17020

# Limit the max number of connections to this node
maxconnections=20
Hit Ctrl + X followed by Y then Enter to save the file.
Let's Create a Script to Run the Daemon
cd ~
nano startnyc.sh
#!/bin/bash
/usr/local/bin/newyorkcoind -daemon
Hit Ctrl + X followed by Y then Enter to save the file.
chmod +x startnyc.sh
crontab -e
Select option 2 for nano as the editor and press Enter
@reboot /home/pi/startnyc.sh
Should look like below:
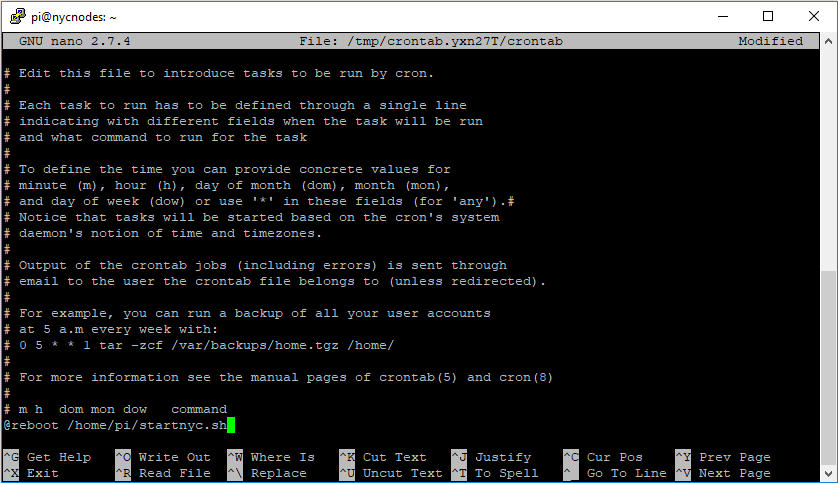
Hit Ctrl + X followed by Y then Enter to save the file.
sudo reboot
newyorkcoin-cli getinfo
If everything is working correctly, you should see:
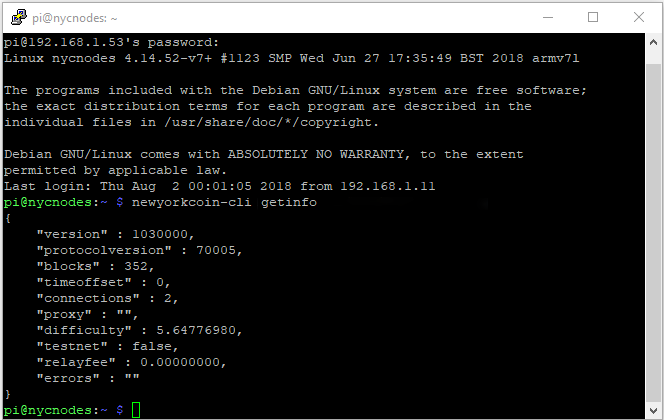
In the Terminal or SSH window if you click on the UP arrow then press Enter you will notice the "blocks" size count increase.
The blockchain is being downloaded to /home/pi/.newyorkc and this may take an entire week to fully sync.If connection count is stuck at 0 and does not seem to increase then try rebooting or restarting the daemon.
sudo reboot
Or, restart the daemon and run getinfo again
newyorkcoin-cli stop
newyorkcoind -daemon &
newyorkcoin-cli getinfo
Port Forwarding on your router must be configured. Port 17020 will need to be forwarded to your devices IP address on your LAN to allow incoming connections. Checkout PortForward.com if you need help with this.
Congratulations if you made it this far, once the blockchain is downloaded your location will show up on the Map and thank you for helping to strengthen the NewYorkCoin network.
Copy the Blockchain Data from PC to Raspberry Pi (optional)
If you have NewYorkCoin Wallet installed on your PC then you can copy the blackchain data from your PC wallet to the Pi to save time on the sync time. Connect to your Pi using WinSCP to transfer the files.
newyorkcoin-cli stop

NOTE: .newyorkc is a hidden directory, to be able to view it in WinSCP you'll need to enable the view hidden files option. Click on Options > Preferences > Panels, then click the Show hidden files checkbox and OK to Save.
newyorkcoind -daemon &
newyorkcoin-cli getinfo
Look at the blocks count, it should be much higher. You're all set and saved yourself over a week of download time. Your location should show on the Map shortly.
Update your Raspberry Pi to the Latest v1.3.1.18
- NYC v1.3.1.18 update requires new blockchain files so you will need to delete the existing files. Let's Stop the daemon first before deleting the files.
- Now we can delete the files mentioned above, to do so run the following commands in order. This will delete all files except for newyorkcoin.conf and wallet.dat in /home/pi/.newyorkc. Just an FYI, deleting wallet.dat is not necessary on the Pi since wallet functionality is disabled.
- Let's start the update install
- Once everything is finished, you'll need to Copy the Blockchain files from your PC to the Pi.
- Reboot the Pi after to autostart the NYC daemon and be patient, it will take over an hour to sync up.
Connect to your Raspberry Pi via SSH using Putty or remote to desktop using VNC Viewer from your computer. You can also connect to it with your keyboard/mouse/monitor and use Terminal.
newyorkcoin-cli stop
cd /home/pi/.newyorkc
rm -v -r !("newyorkcoin.conf"|"wallet.dat")
cd ~/bin
cd nycoin
git pull
./autogen.sh
./configure --enable-upnp-default --disable-wallet
make -j2
sudo make install
sudo reboot